✨ Introduction #
Creating a Space Group is the first step in setting up Kaamfu’s work hierarchy. Once created, a Space Group automatically generates all the default child objects you need to start organizing work.
📍 Location of a Space Group #
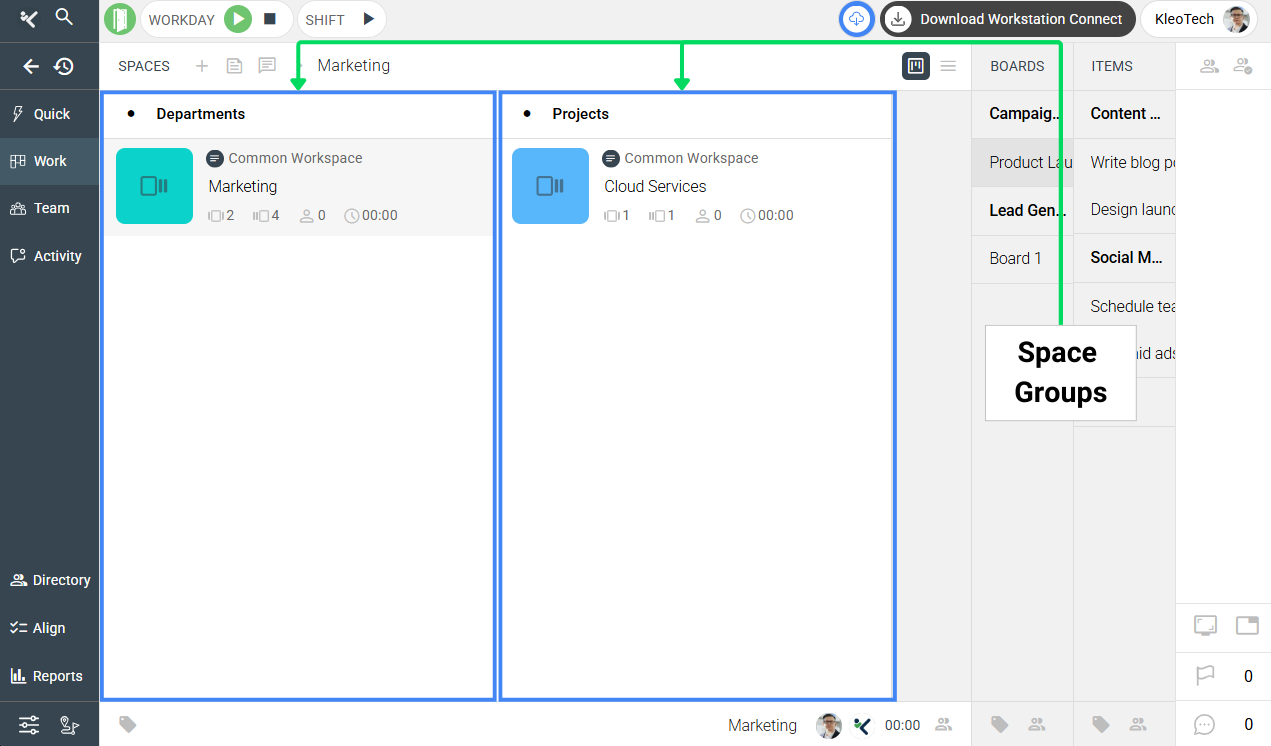
Space Groups live in the Spaces subpanel of the Work Panel, which is accessible from the navigation sidebar on the left side of the app.
The Spaces subpanel forehead includes the + icon, which is used to create new Space Groups. Once a Space Group is created, it will appear in this same subpanel, with its Spaces shown as tiles in the content area.
.
.
This ensures that the Spaces subpanel is always the starting point for creating and managing Space Groups.
.
🎯 Why This Feature Matters #
Without a Space Group, no tasks can exist in Kaamfu. Creating one not only gives you a container for your departments, projects, or clients, but it also saves time by auto-creating the hierarchy beneath it.
This ensures you can start structuring work immediately without needing to build every level manually.
#
👤 Who Should Read This #
This article is useful for:
- Organization Owners who set up their company workspace.
- Workspace Admins responsible for managing work structures.
- Managers learning how new Space Groups are initialized.
#
📝 What This Guide Covers #
In this guide, you’ll learn:
- How to create a new Space Group.
- What objects are created automatically.
- How to rename default objects.
- How to navigate back to the Spaces subpanel.
By the end, you’ll be able to set up new Space Groups and understand how they initialize.
#
📄 Feature Overview #
A Space Group is created from the Spaces subpanel in the Work Panel. Once you hit the create button, it comes preloaded with a full set of default objects to ensure your hierarchy is ready to use immediately.
#
🛠️ Step-by-Step Instructions #
Here are the steps to create a new Space Group:
Step 1: Click the + icon #
In the forehead of the Spaces subpanel, click the + icon.
Step 2: Name your Space Group #
A new Space Group will appear with the cursor active on the header. Type a name for it and press ENTER.
Step 3: View the auto-created hierarchy #
Once saved, the following default objects are created automatically:
- Space 1
- Board Group 1
- Board 1
- Item Groups “To Do” (open) and “Done” (closed)
To Do keeps tasks active; Done closes them automatically when moved.
The view will briefly shift to the Boards subpanel and then to the Items subpanel to display the created objects.
Step 4: Return to the Spaces subpanel #
Click Spaces in the forehead row to return. From here, you can rename the default Space and continue renaming objects in the Boards and Items panels.
Step 5: Rename the defaults objects #
Click on the names of the default objects and rename them as per your preferences.
#
✅ Next Steps #
After creating a Space Group:
- Add members to the Space Group so they are included across the entire hierarchy.
- Begin creating new Spaces inside the Space Group for departments, projects, or client accounts.
Following these steps ensures your Space Group is customized and ready for real work.
💡 Key Benefits #
Space Group creation makes your setup faster and easier by:
- Auto-creating structure: No need to manually add child objects.
- Providing ready-to-use defaults: “To Do” and “Done” groups help start task management instantly.
- Maintaining hierarchy consistency: Every Space Group starts with the same baseline.
This reduces setup time and keeps work aligned across teams.
#
🔗 Related Resources #
Here are other resources you may find useful:
- Exploring the Navigation Panel in Kaamfu
- An Overview of the Kaamfu Web Application
- What is the Work Panel?
These resources will help you move from creating Space Groups to fully managing them.