✨ Introduction #
Aligning your workspace is the first and most important step to getting Kaamfu fully operational. The Align Panel provides a guided sequence of setup tasks to help Owners and Admins configure every critical element — from inviting team members to enabling live shift tracking. Completing these steps ensures that your workspace is ready for collaboration, time tracking, and productivity monitoring.
.
🎯 Why Workspace Alignment Matters #
Workspace alignment defines how your organization operates inside Kaamfu — from member access to workday rules and compliance mandates. Without completing this alignment, your team may face setup delays or incomplete tracking.
You’ll benefit by:
- Ensuring every workspace-level configuration is complete.
- Enforcing accurate tracking via Workstation Connect.
- Enabling real-time collaboration and reporting from day one.
Alignment transforms a new workspace into a structured, ready-to-work environment.
.
👤 Who Should Read This #
This guide is for workspace Owners and Admins who handle onboarding and setup in Kaamfu.
- Owners perform the first-level configuration (invites, mandates, admin roles).
- Admins assist with project creation and reporting setup.
Regular members do not have access to the Align Panel.
.
📝 What This Guide Covers #
This guide walks you through completing each of the seven steps in the Align Panel.
You’ll learn how to:
- Use the Align Panel options correctly
- Perform each action linked to workspace setup.
- Confirm completion and readiness for operation.
By the end, you’ll have a fully aligned, functional workspace.
.
🛠️ Step-by-Step Instructions #
Follow each option in the Align Panel to complete your workspace alignment. Each section below matches the options visible in your Align checklist.
Invite Your Team #
To begin setting up your workspace, invite your teammates to Kaamfu so collaboration can start immediately.
Steps:
- Click Invite your team in the Align list.
- In the right panel, you’ll see three sections:
- Invite from the Directory
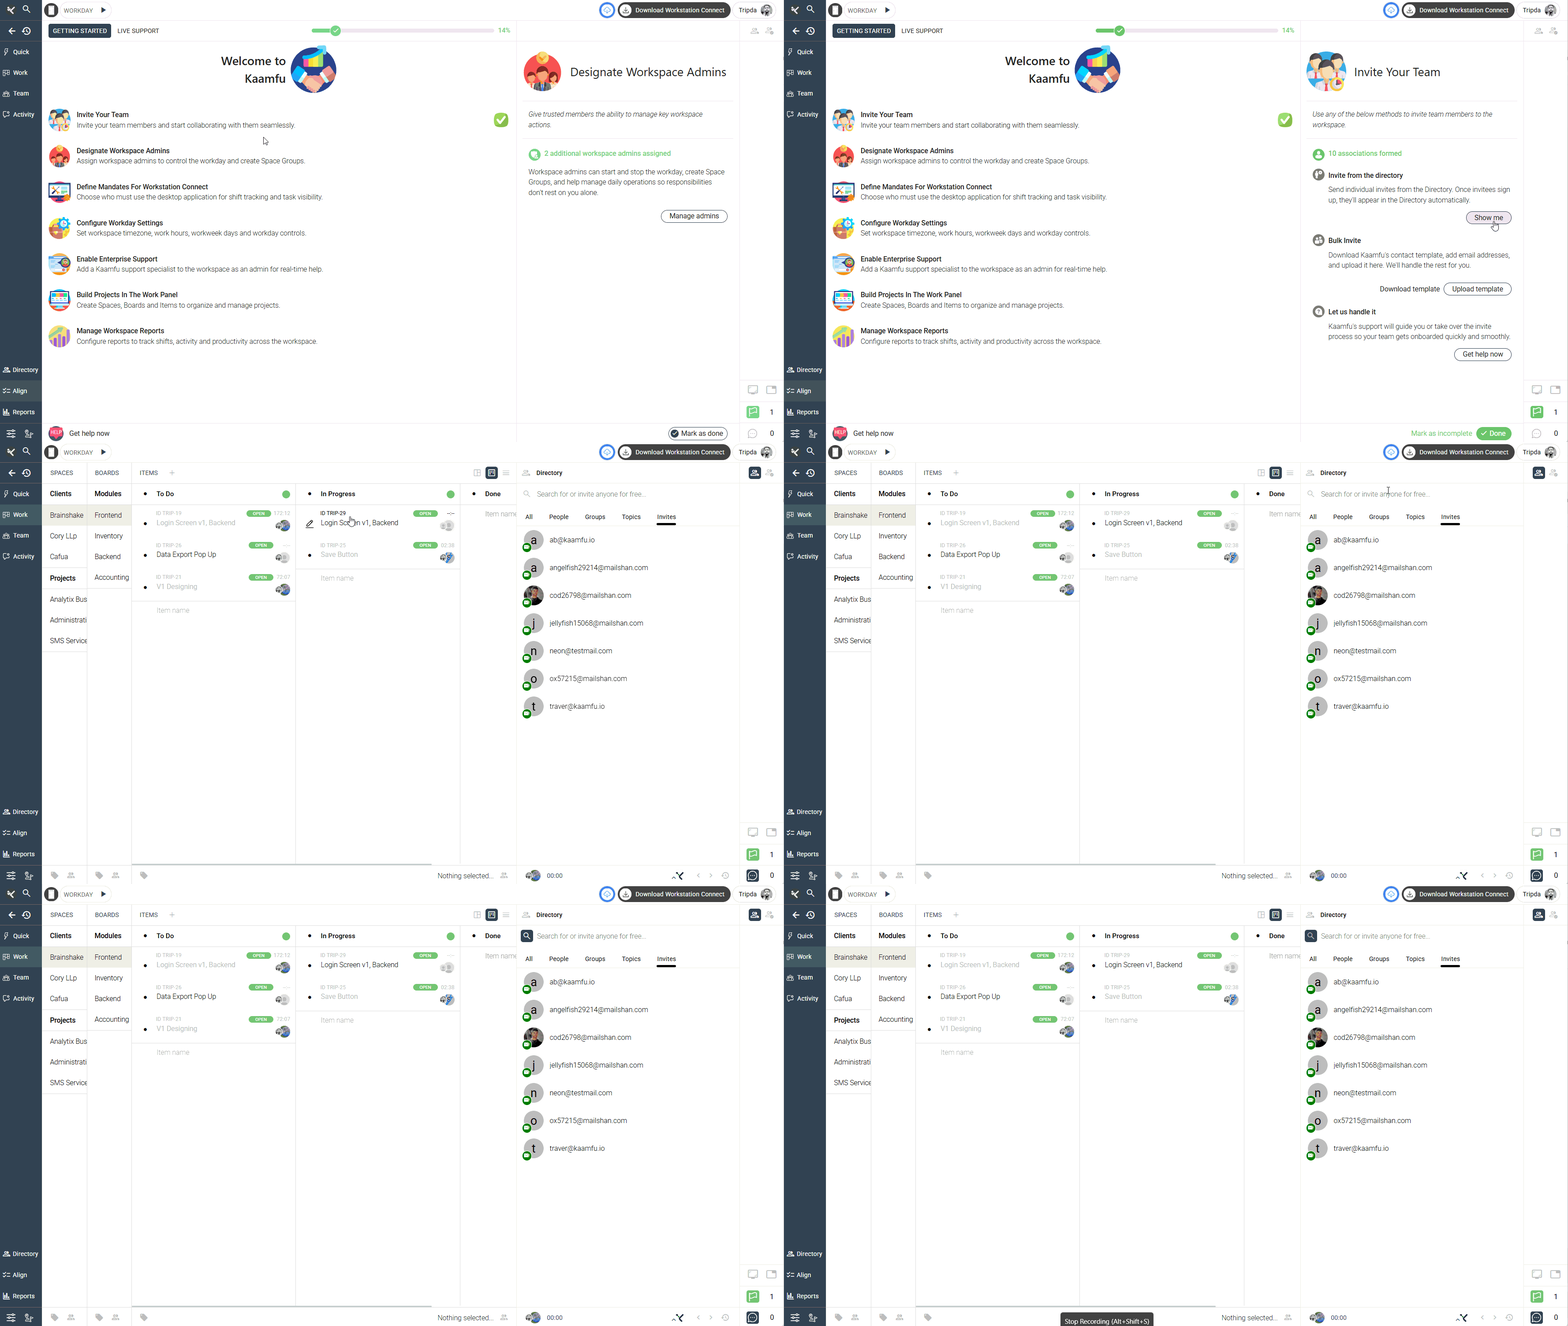
Click Show me to go to the Directory Page. From here, invite a single teammate directly
.
- Invite from the Directory
 .
.
-
- Bulk Invite
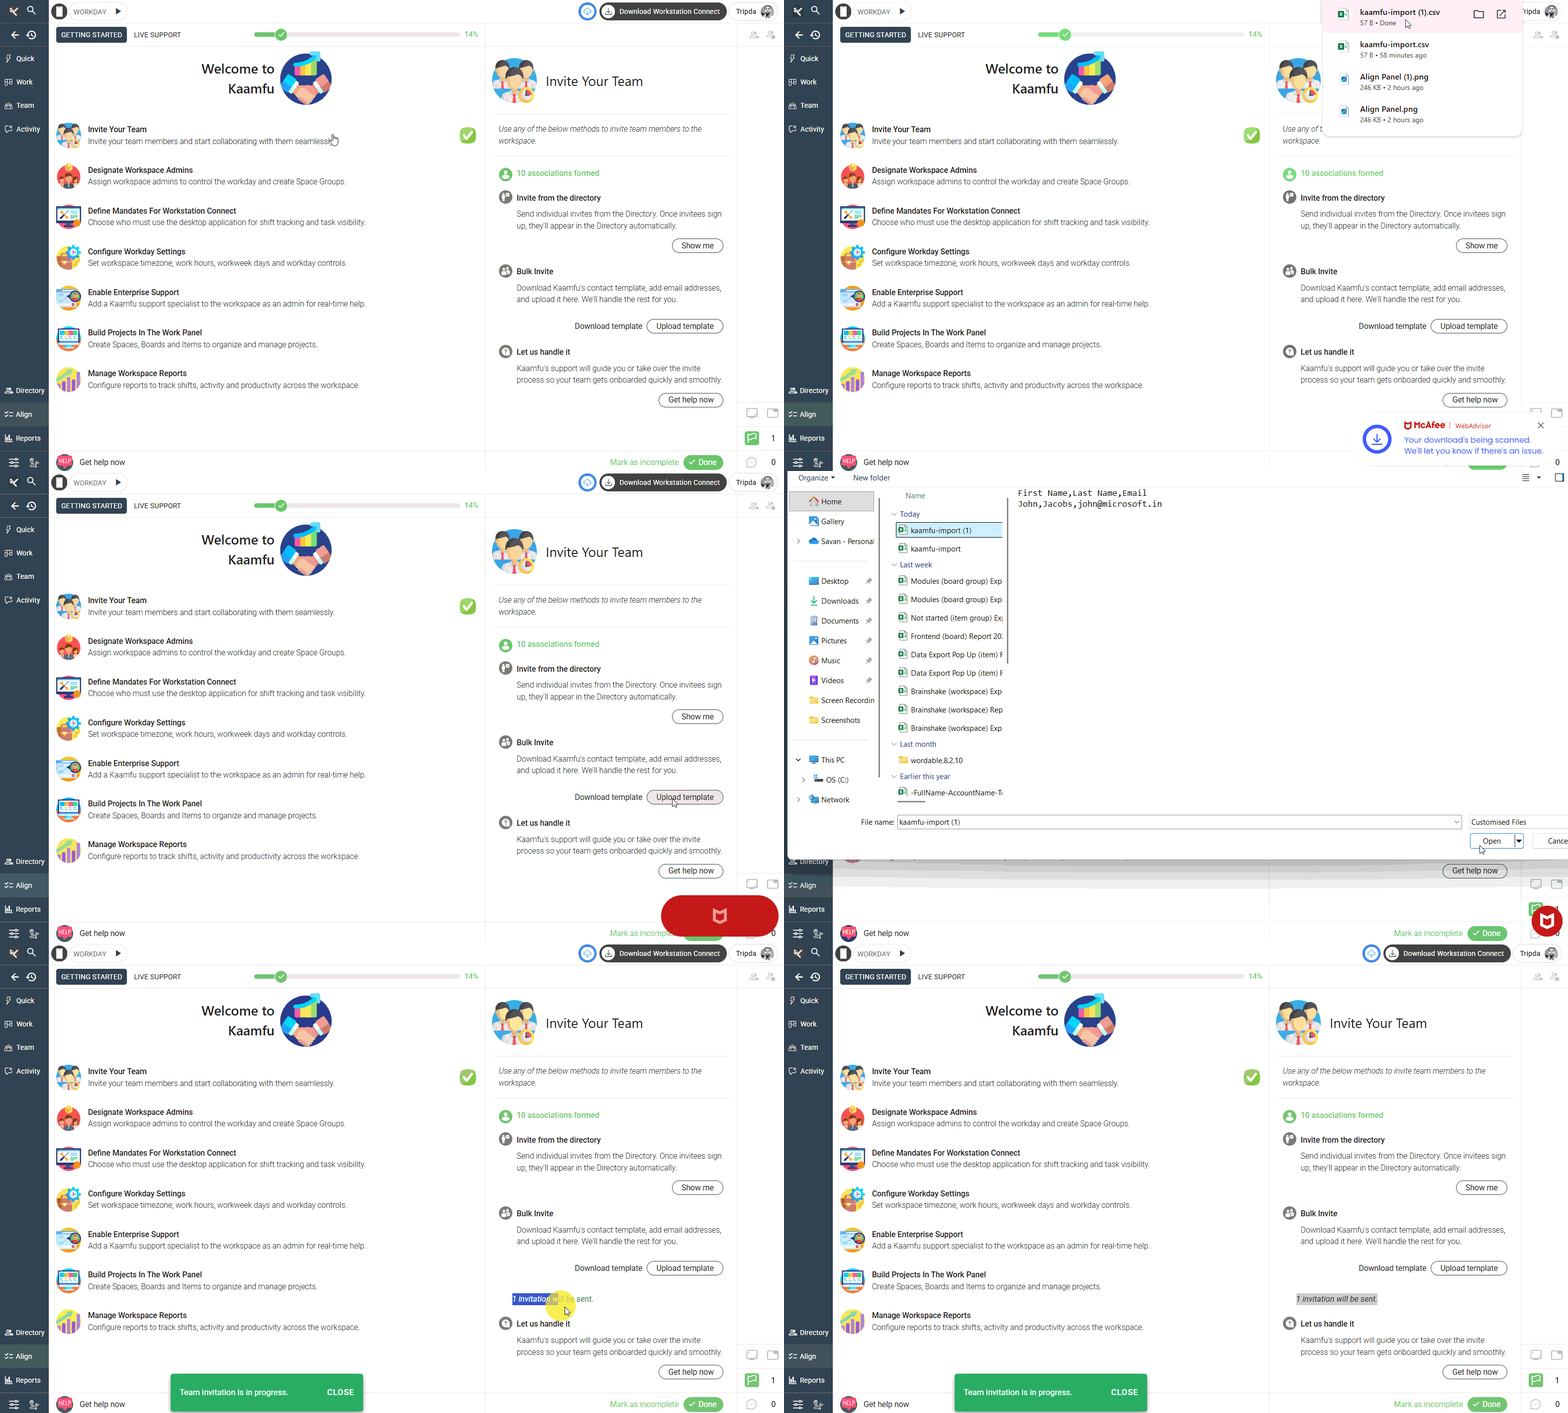
Click Download Template to get the sample CSV, add user details, and then click Upload Template to import all at once.
.
- Bulk Invite
- .
- Let Us Handle It
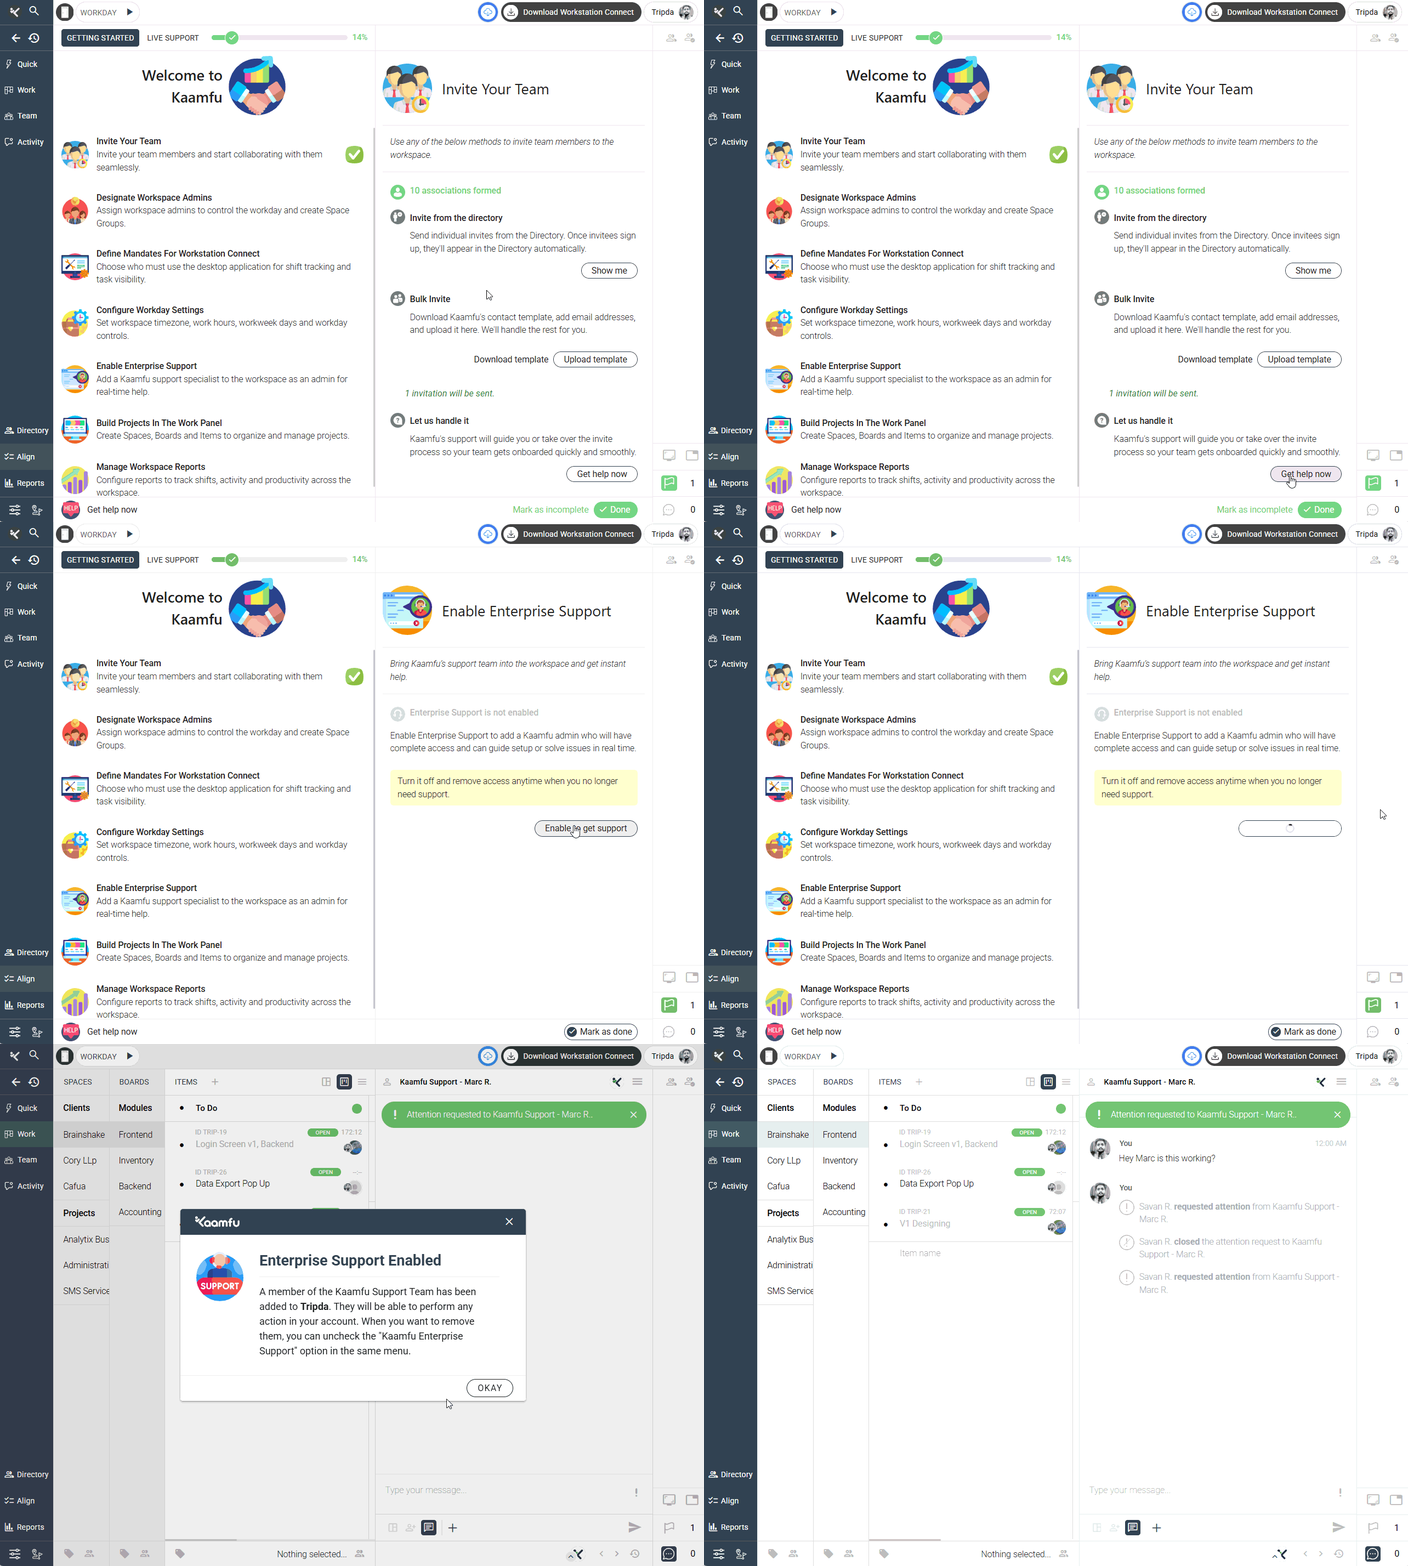
If you need help inviting teammates, click Get Help Now to request onboarding support from Kaamfu.
...
- Let Us Handle It
 .
.
Designate Workspace Admins #
Assign workspace admins who can manage workday controls, projects, and team operations.
Steps:
- Click Designate Workspace Admins in the Align list.
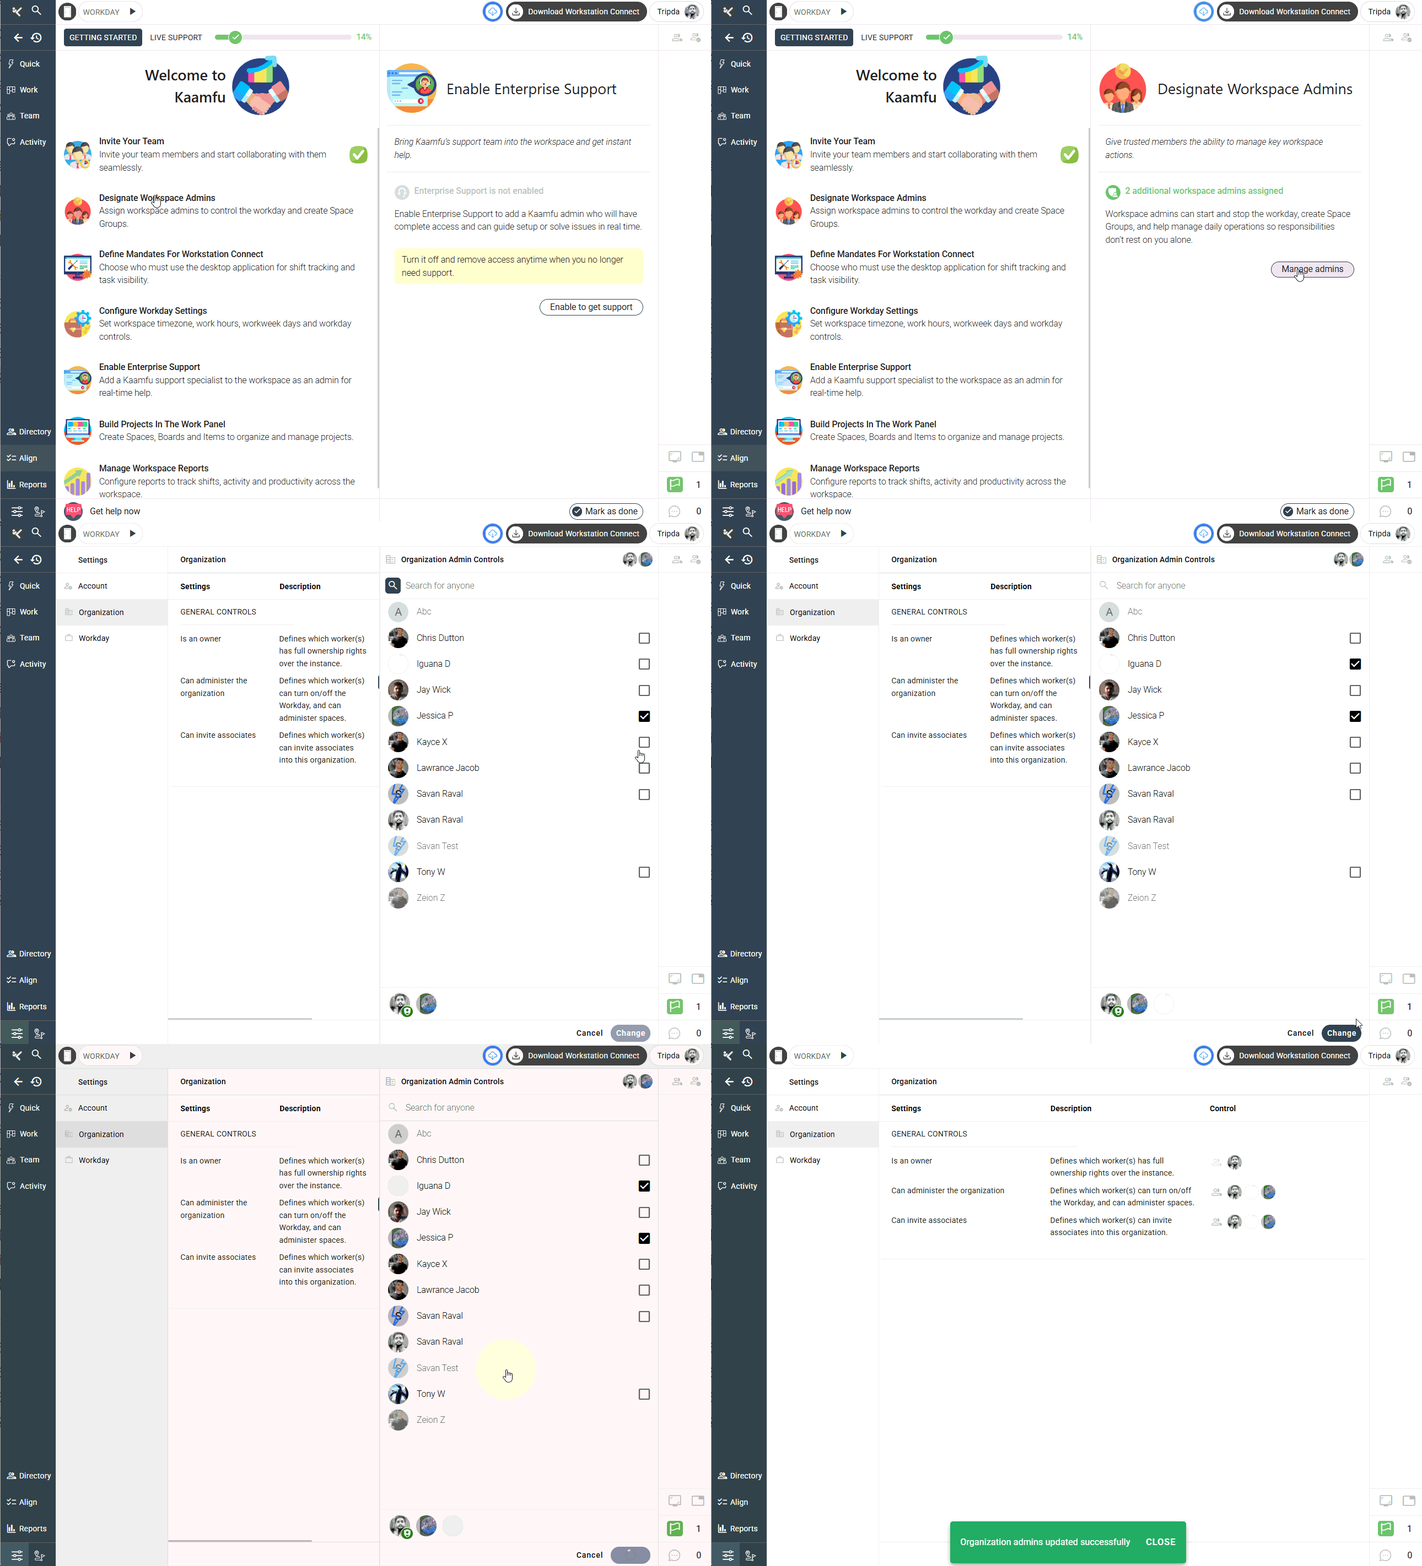
- On the right panel, click Manage Admins.
- You’ll land on the Organization Settings page with the teammate selection panel open.
- Select the preferred member(s) and click Change to promote them to Admin role.
.
 .
.
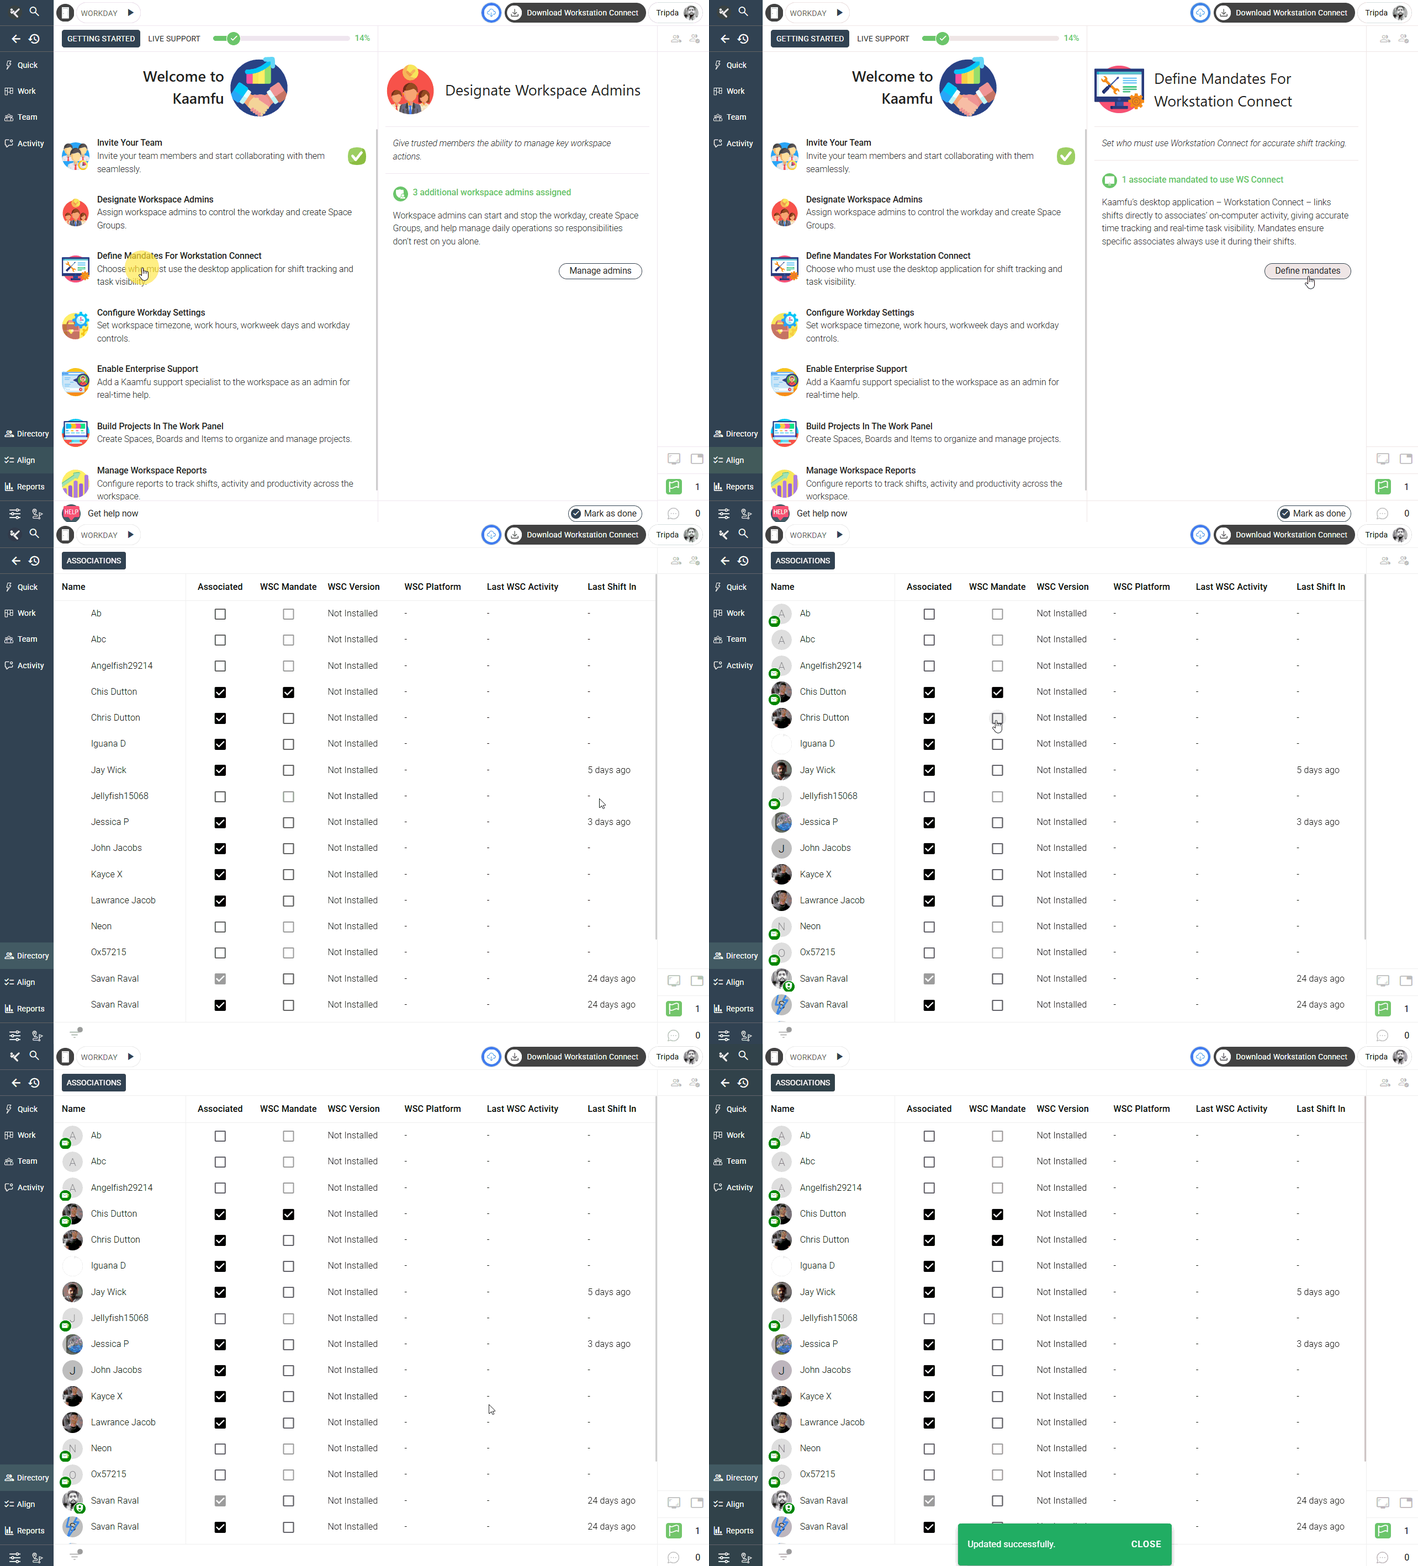
Define Mandates for Workstation Connect #
This step lets you decide who must use Kaamfu’s desktop app for shift tracking and task monitoring.
Steps:
- Click Define mandates for Workstation Connect in the Align list.
- In the right panel, click Define Mandate.
- You’ll land on the Directory Page.
- From the employee list, tick the checkbox under WSC Mandate for each user who should be required to use the desktop app.
- The setting is applied immediately once checked.
.
.
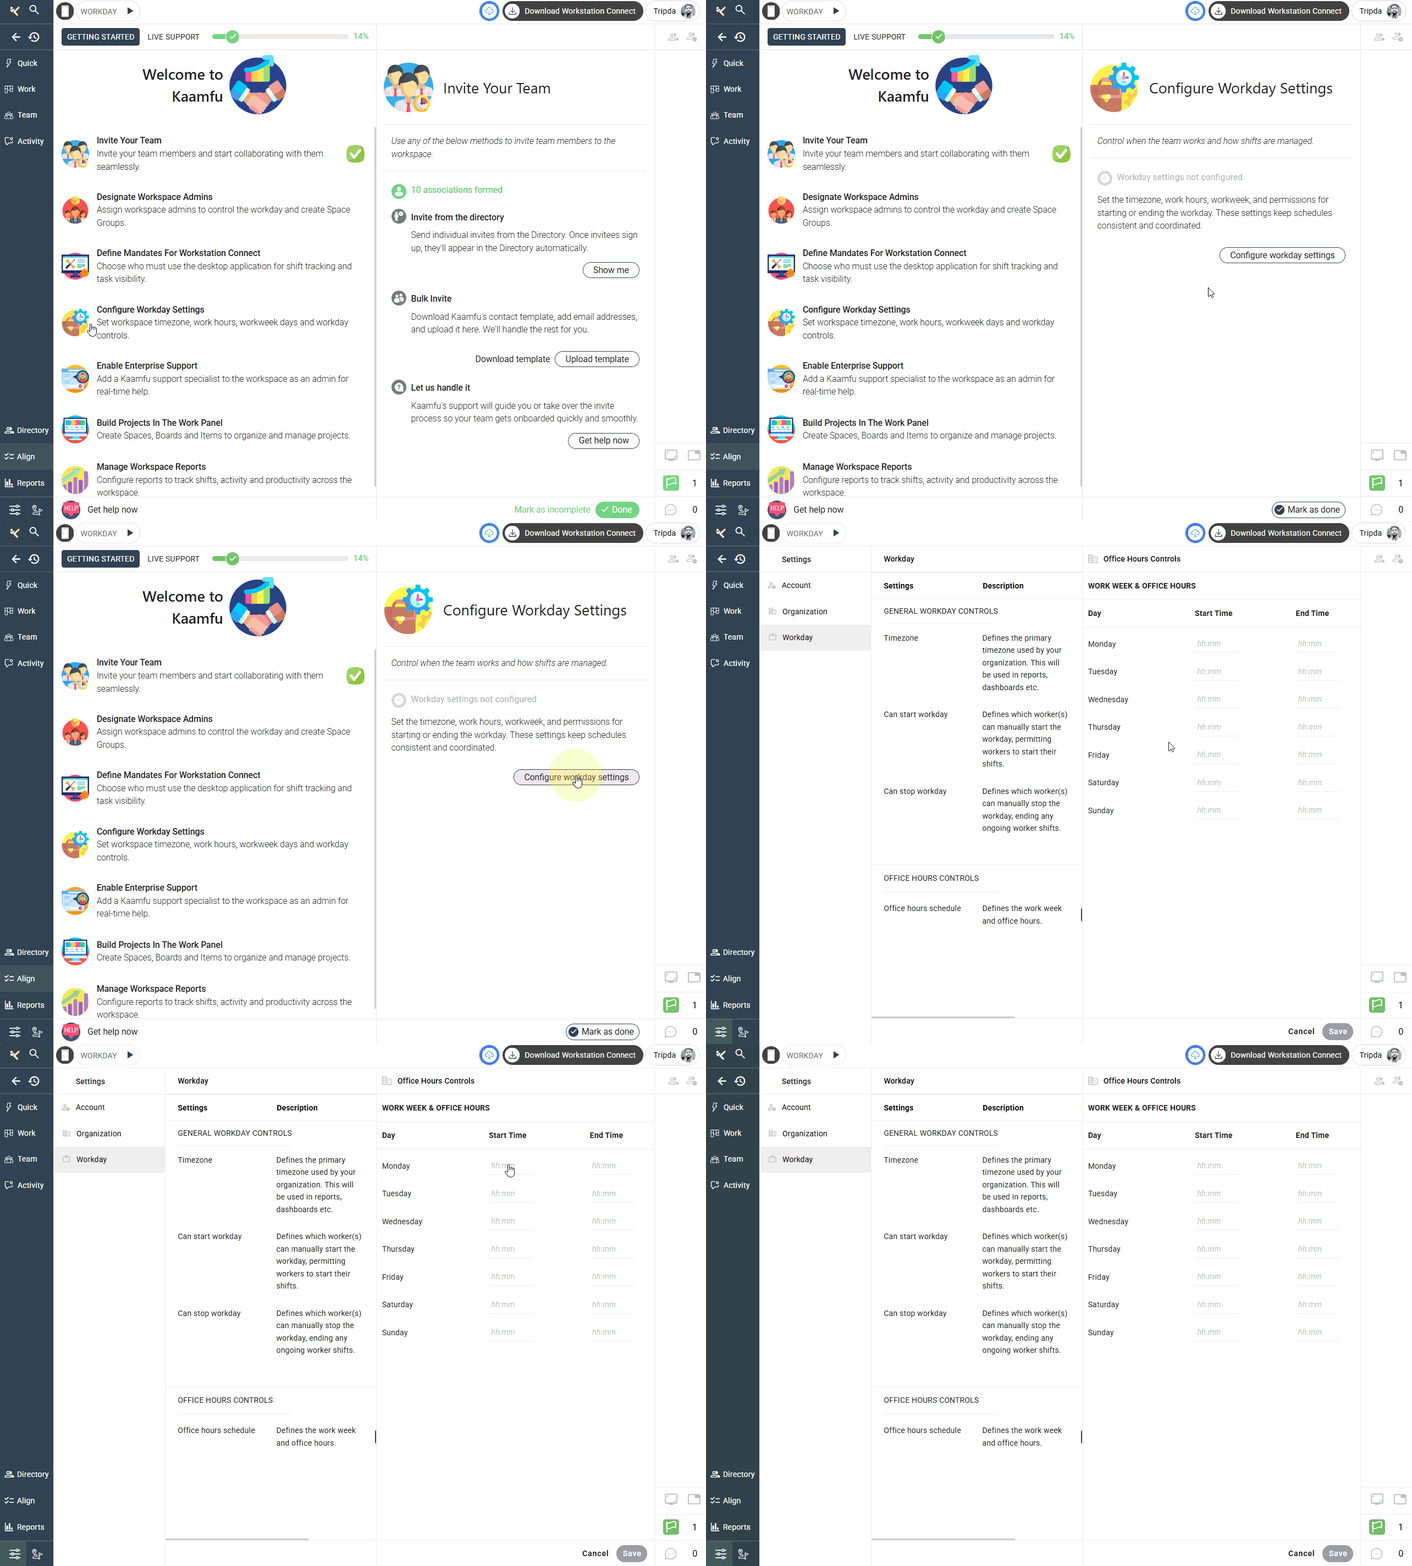
Configure Workday Settings #
Set up your workspace’s official work hours, timezone, and workweek structure to ensure accurate shift tracking.
Steps:
- Click Configure Workday Settings in the Align list.
- In the right panel, click Configure Workday Settings again.
- You’ll land on the Workday Settings page.
- Configure the following options:
- Timezone — ensure it matches your organization’s region.
- Work Hours — define shift start and end times.
- Workweek Days — select the official working days.
- Workday Controls — enable or disable features like auto-pause or overtime limits.
- Timezone — ensure it matches your organization’s region.
- Click Save to apply changes.
.
.
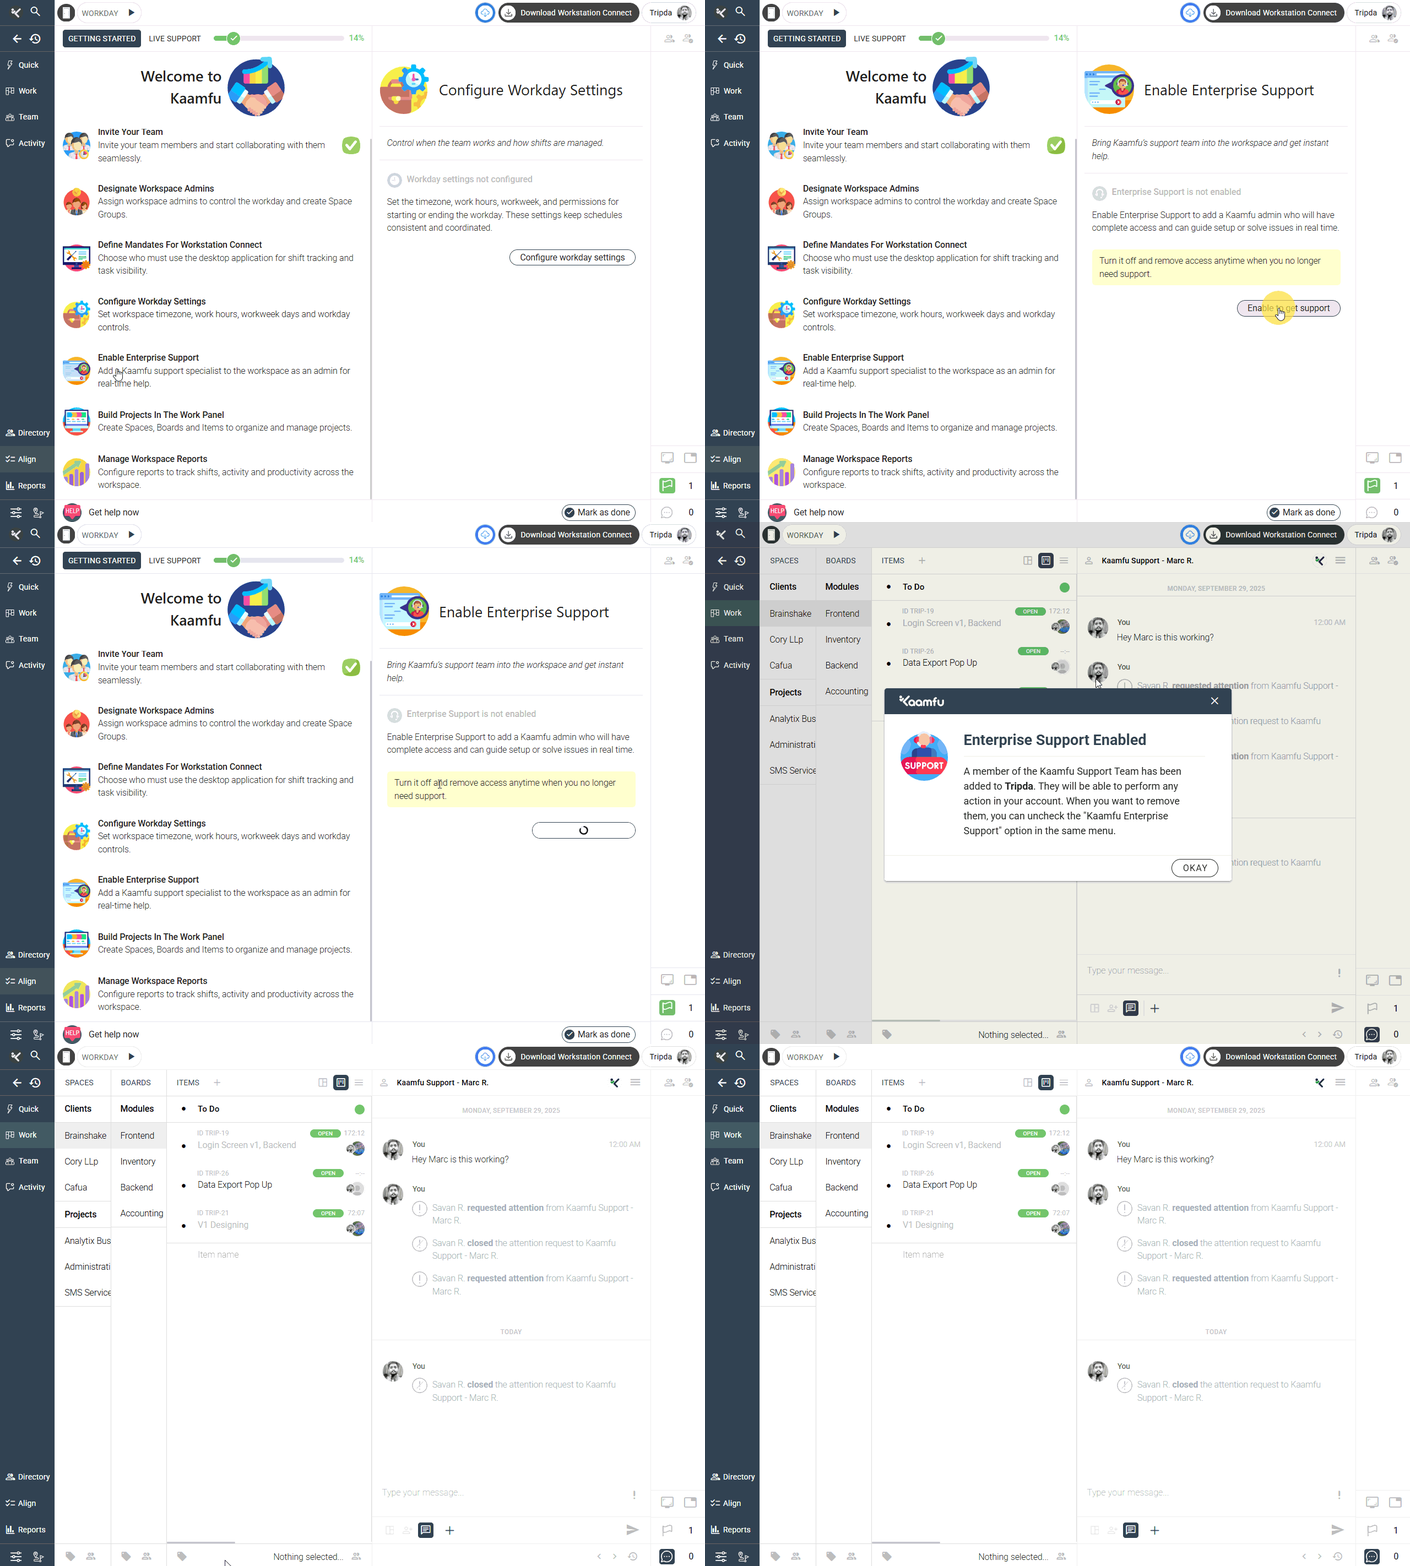
Enable Enterprise Support #
Add a Kaamfu Support Specialist to your workspace as an admin for hands-on onboarding and live help.
Steps:
- Click Enable Enterprise Support in the Align list.
- On the right panel, click Enable Enterprise Support again.
- The specialist will be added as an Admin automatically to provide guided assistance during your workspace setup.
.
. #
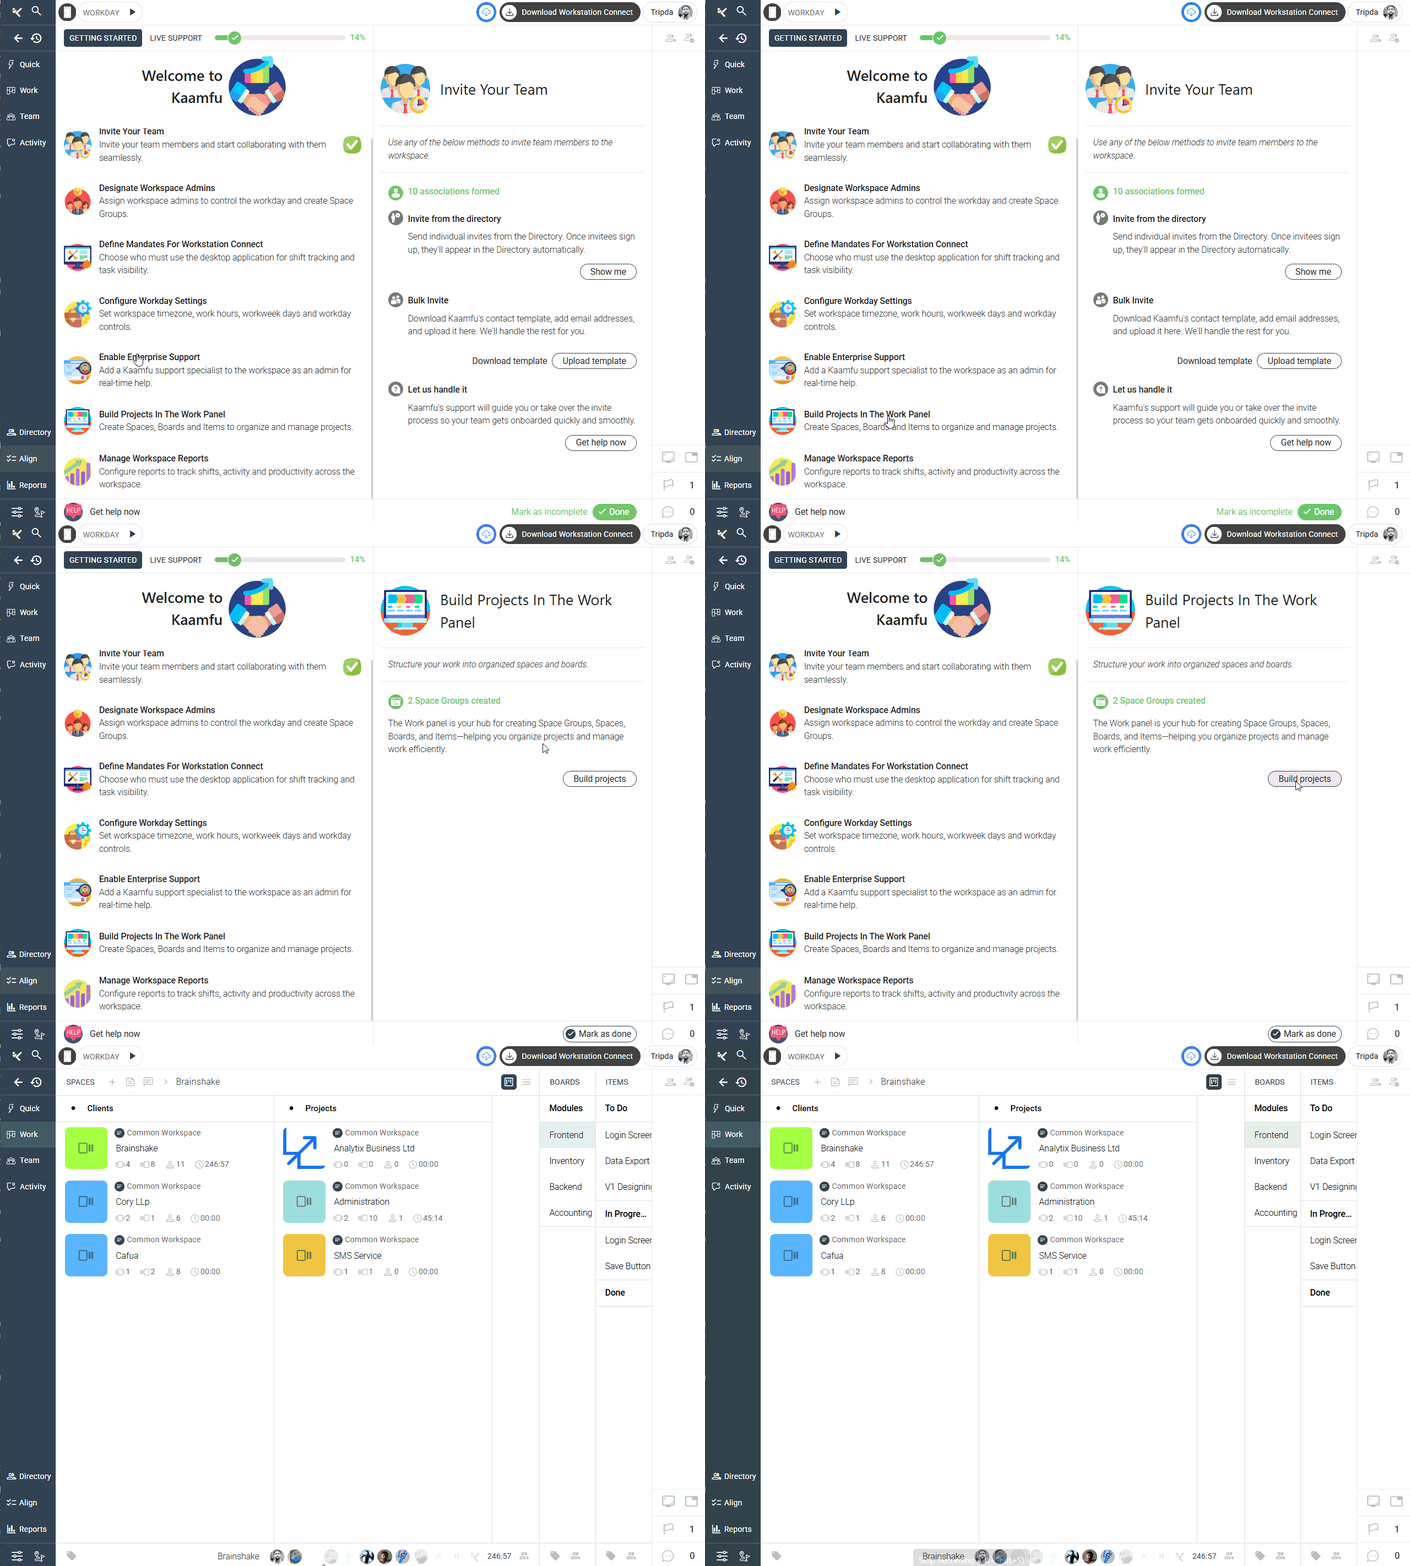
Build Projects in the Work Panel #
This step helps you structure your workspace using Spaces, Boards, and Items.
Steps:
- Click Build Projects in the Work Panel in the Align list.
- In the right panel, click Build Projects.
- You’ll land in the Work Panel.
- Create your organizational hierarchy:
- Spaces for departments.
- Boards for projects.
- Items for tasks.
- Spaces for departments.
- Assign owners, members, and set priorities as needed.
.
.
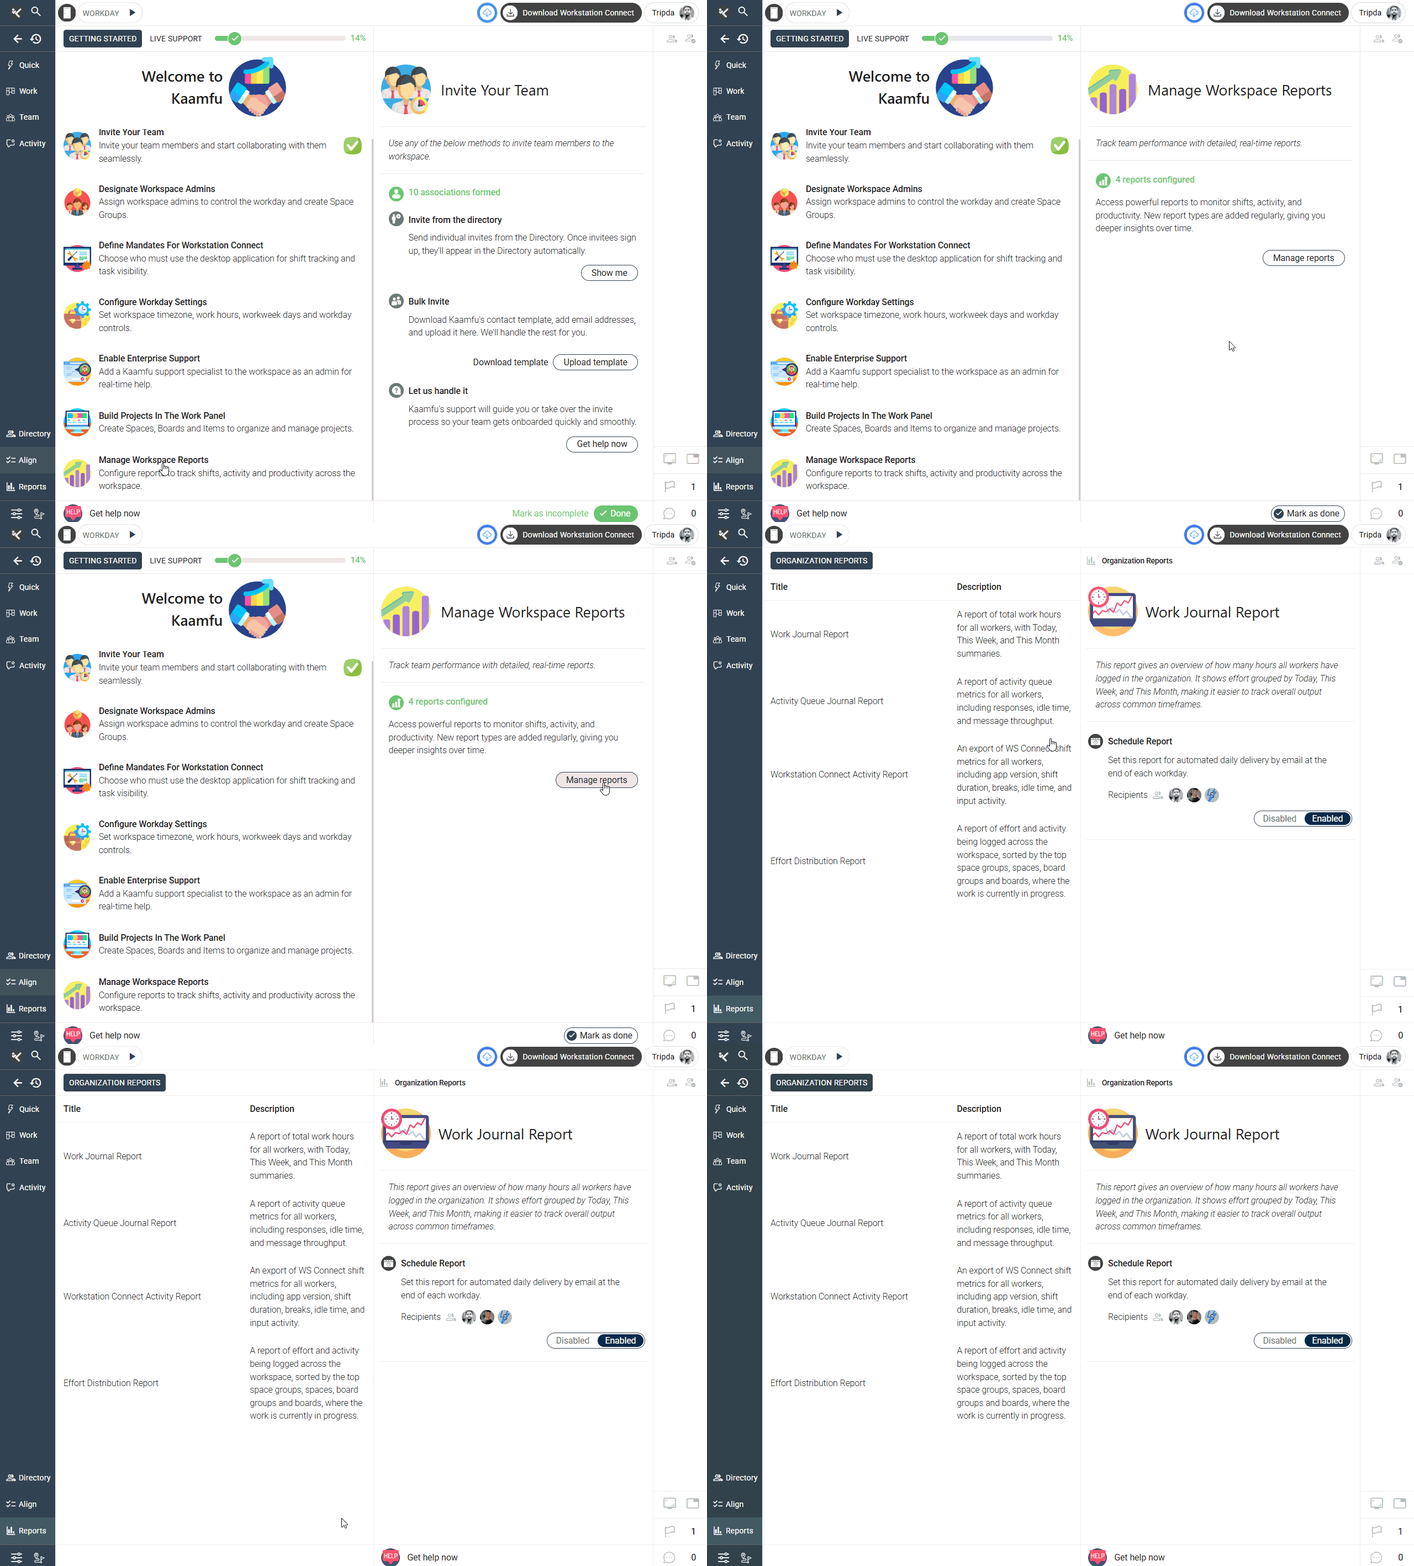
Manage Workspace Reports #
Use this step to configure reports for tracking shifts, productivity, and activity across your workspace.
Steps:
- Click Manage Workspace Reports in the Align list.
- On the right panel, click Manage Reports.
- You’ll land on the Reports Page.
- Choose or configure the reports you want to view (Shift Logs, Activity Reports, Productivity Trends, etc.).
- Save any filter preferences or report schedules.
.
.
.
💡 Key Benefits of Completing Alignment #
- Operational readiness: Workspace setup is complete and verified.
- Centralized control: Owners and Admins can track setup progress at a glance.
- Accuracy: Shift, task, and time tracking work consistently.
- Ease of onboarding: New users enter a workspace that’s ready and structured.
.
🔗 Related Resources #
Here are other resources to help you refine your workspace setup:
- What is the Align Panel?
- How to Configure Workday Settings
- What is the Work Panel?
- How to Invite and Manage Team Members
These guides complement the Align Panel steps and help you maintain a fully configured workspace in Kaamfu.


